My Basket
Sample
Loading...
People often search for tips or a solution on how to wallpaper a chimney breast, but many don’t realise that it is no different in technique from any other wall or wallpapering a feature wall.
The only exception and most important thing to consider is where the best starting point may be, which can often be dictated by the size of pattern on your chosen wallpaper.
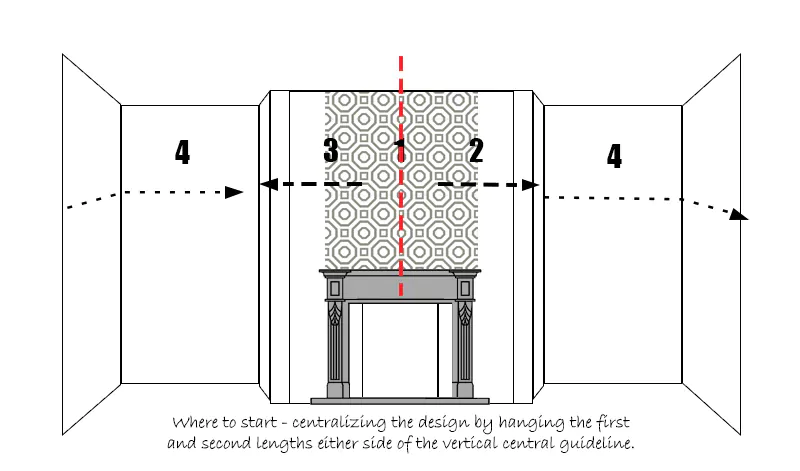
For large-patterned wallpapers it is important to make sure the most prominent part of the design or motif is centralized on the chimney breast to provide the most balanced effect.
However, if you hanging wallpaper in the entire room, then you need to consider the best starting point as a whole, so please consider our guide where to start wallpapering for more information.
Below are two examples and options to consider when deciding how to wallpaper a chimney breast.
Please note though if you are purchasing luxury wallcoverings then we would always consult the advice of a professional decorator, as these notes are only here to serve as a guide.
How to wallpaper a chimney breast - Method 1
Method 1:
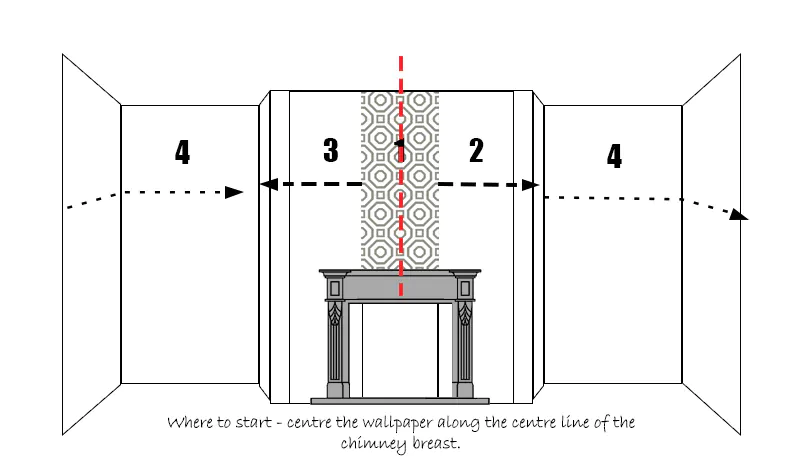
Method 2: